
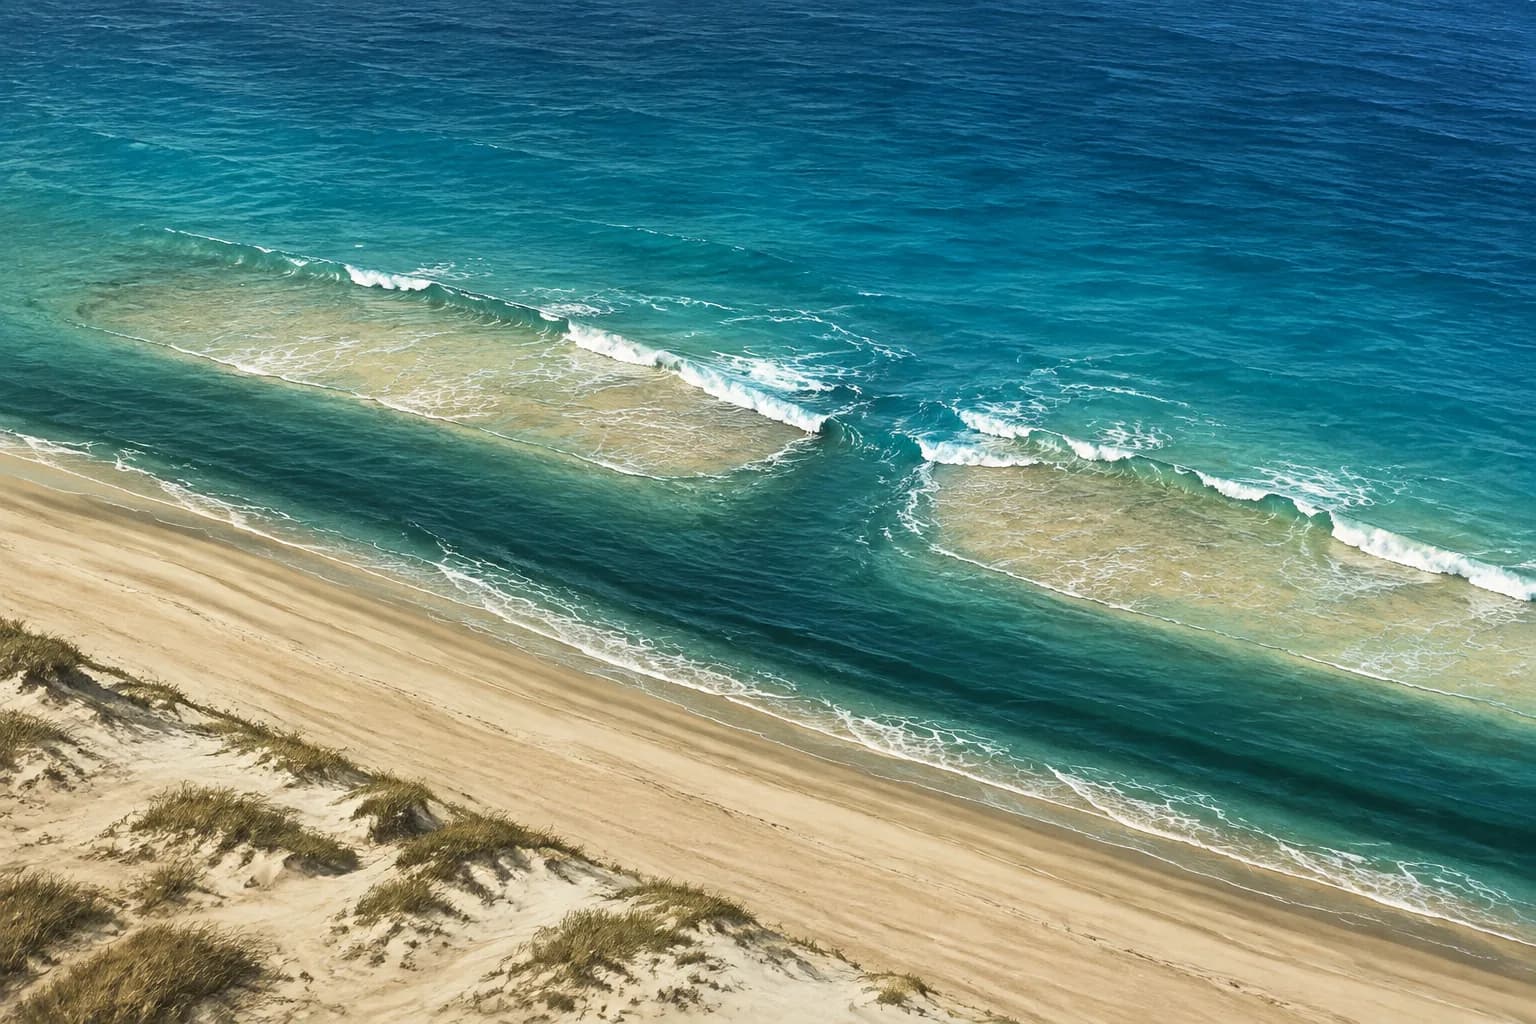
Read the beach from dry shore
Begin from a safe position on dry shore. Check the local beach forecast and posted warnings, follow lifeguard instructions, and keep a retreat route as the water rises. Do not wade into a trough or cross a cut to verify what you think you can see.
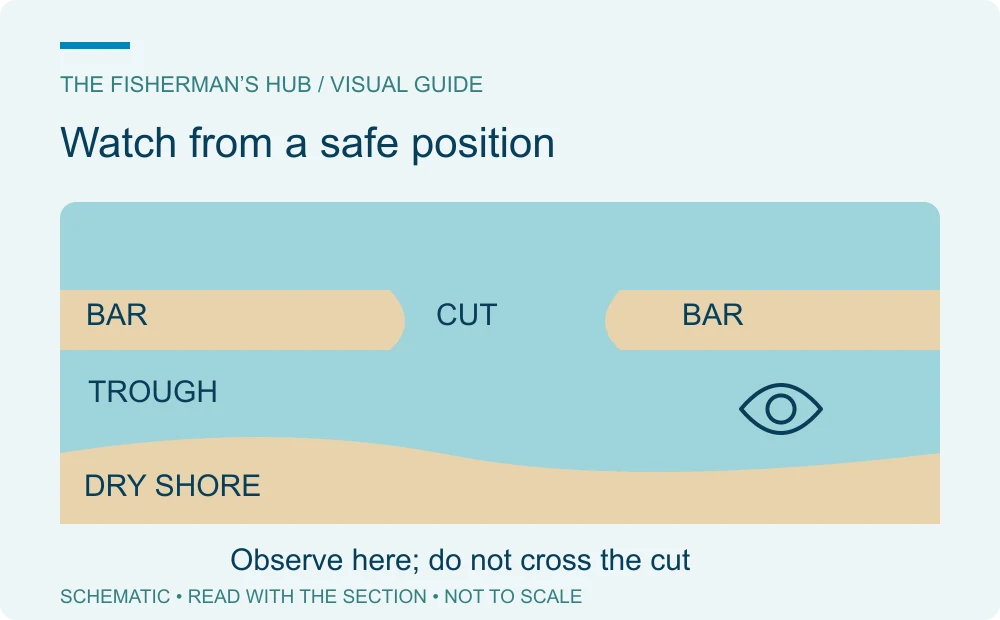
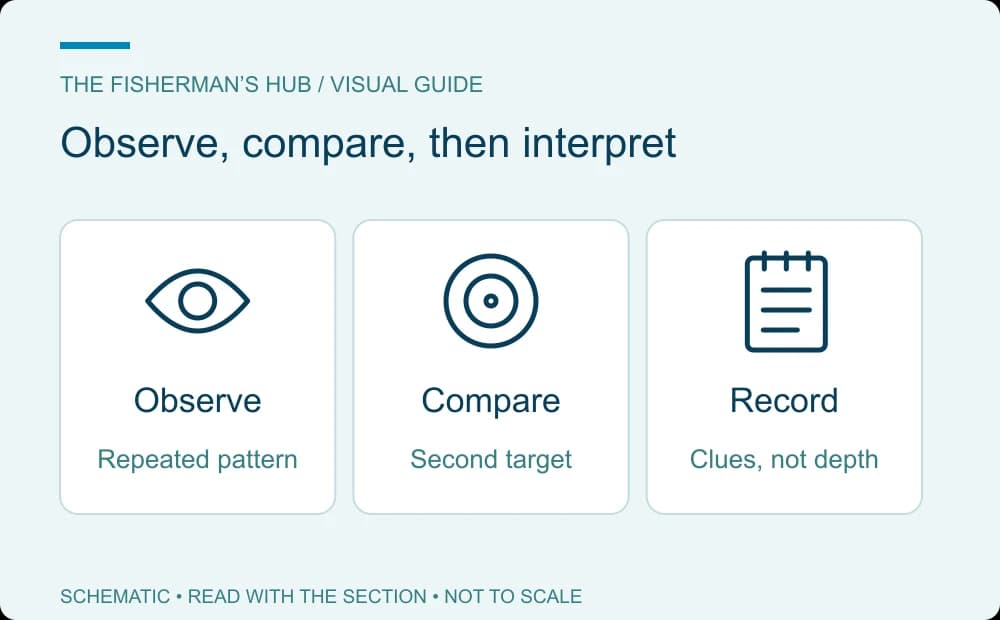
Give yourself a few minutes to compare the water straight ahead with the beach on either side. Watch a sequence of larger and smaller waves. A feature that appears in the same place repeatedly is more useful than a single unusual wave.
Choose a stationary reference on land, such as a beach access sign. Note whether the area you want to fish lies left or right of it. This makes it easier to cast at the same target after you look down to bait a hook. Leave room for other anglers, swimmers, and your route back up the beach. If you are still preparing your first outfit, work through the surf-fishing setup checklist before deciding what you can comfortably cast from that position.
The National Weather Service explains that rip currents can form where less wave breaking occurs between areas of stronger breaking. A quiet-looking gap in whitewater can therefore be a hazard, not a safe path through the surf. Rip currents also occur beside structures and on beaches without an obvious sandbar pattern.
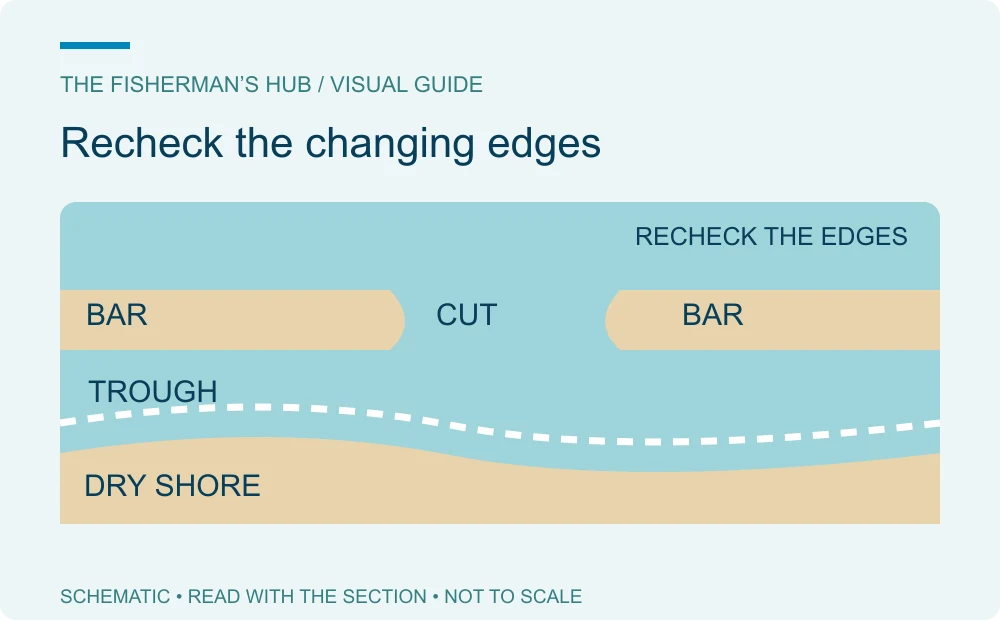
Spot sandbars, troughs, and cuts
The Take Me Fishing surf guide describes a bar as a shallow underwater feature, a trough as a deeper channel beside it, and a seam as a gap connecting water on either side. Those distinctions help you turn a broad view of the ocean into a few places to investigate.
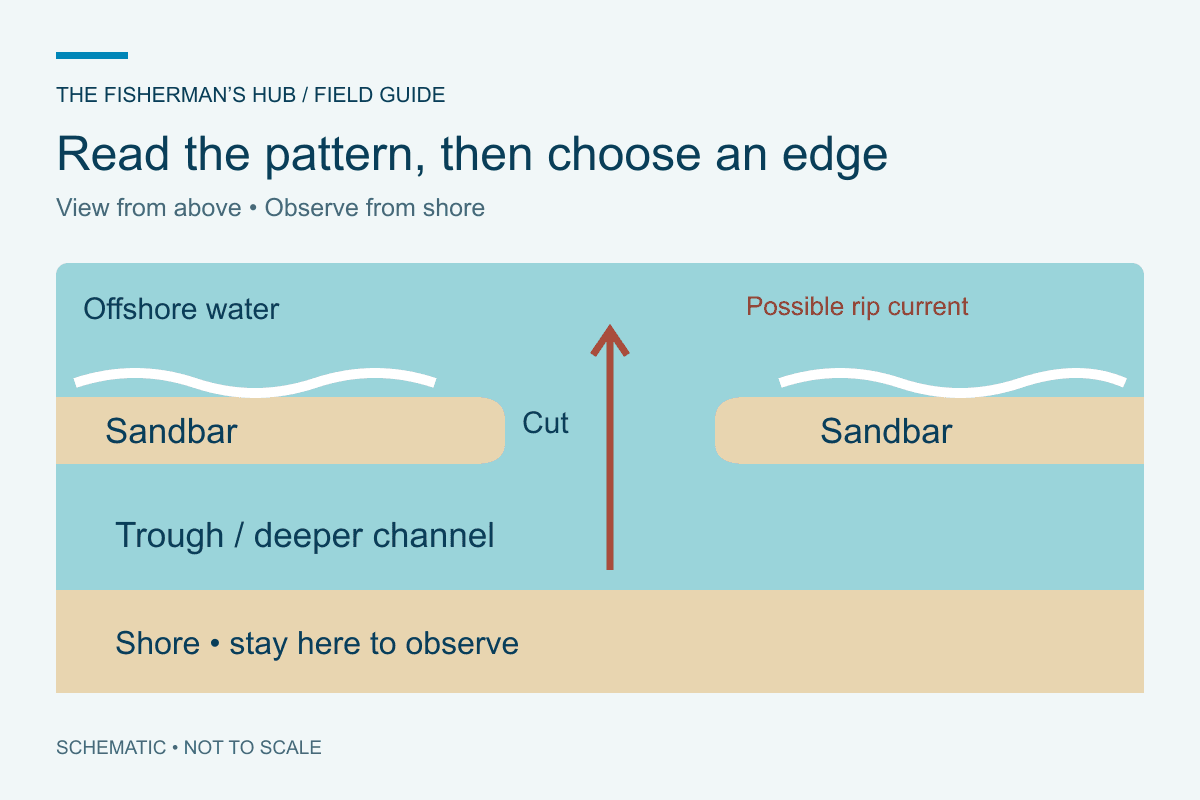
| Feature | What to look for | How to use the clue |
|---|---|---|
| Sandbar | Waves repeatedly crest and break along a similar line. | Use it to locate the adjoining water, rather than automatically casting beyond it. |
| Trough | A strip where waves settle or reform between the bar and shore, or between two bars. | Try a reachable edge or change in this channel. |
| Cut or seam | A persistent interruption in the breaking-wave line. | Observe the adjacent edges from shore; the gap may carry dangerous current. |
Choose between reachable casting targets
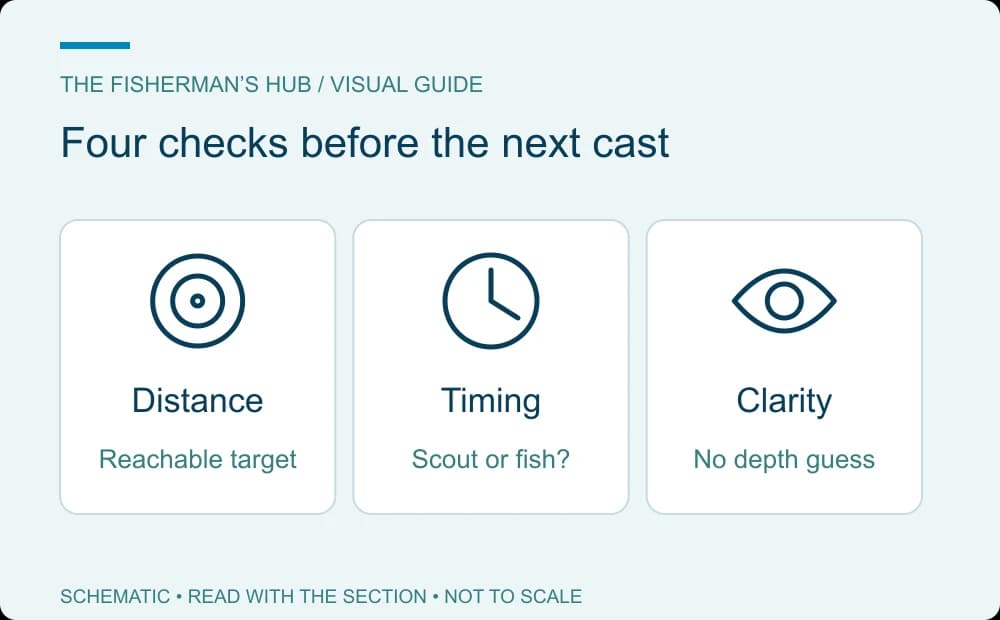
Start by comparing two reachable options: an edge of the near trough and a change beside the bar. You do not need your longest cast to make this comparison. Casting farther can simply skip the feature you wanted to investigate.
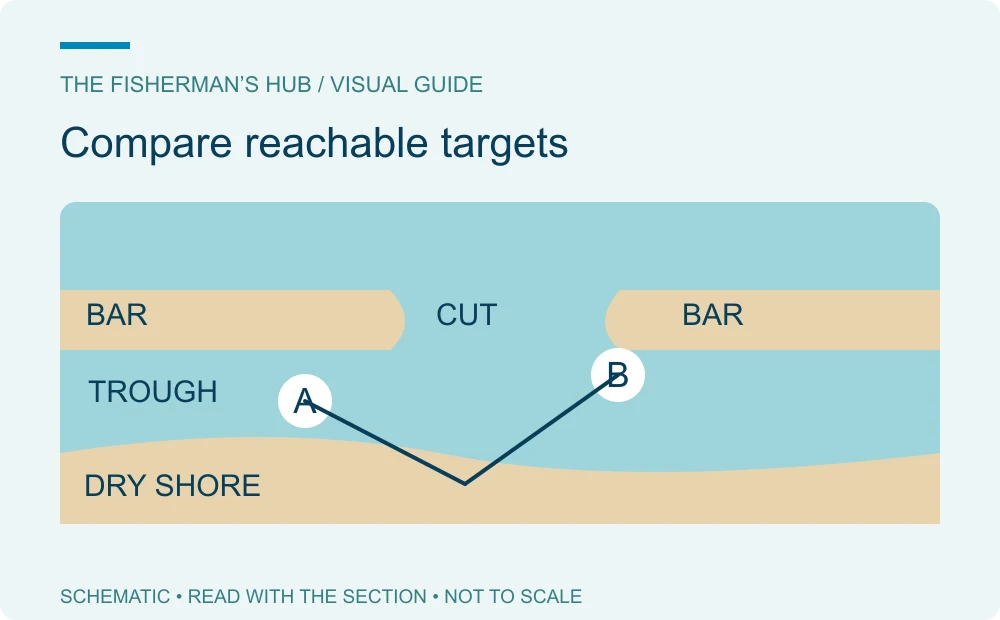
For example, imagine a continuous line of whitewater with one persistent gap to your right. From dry shore, identify the edge beside that gap and a second target in the nearby trough. Make controlled casts to one target at a time. If the rig immediately sweeps away, you have learned that your presentation is not staying where you intended; it does not prove there are no fish. Use the sinker-weight checklist to separate a holding problem from a poor choice of fishing location.
Keep the bait or lure, target distance, and time spent fishing reasonably consistent while you compare locations. Changing all three at once makes it difficult to tell what helped.
Choose a position with enough room for your whole cast and a clear route back. Keep the bait and rig consistent for the first comparison. The purpose is to learn where you can present that bait effectively under the conditions you actually have. If you are fishing a sliding-weight bait setup, our fish finder rig guide explains the components so you can keep the same rig while comparing those targets.
| Target | What you are testing | What to record |
|---|---|---|
| Near trough edge | Can you keep the bait alongside the change in depth? | Casting direction, whether the rig stays, and any bites |
| Water beside the cut | Does your presentation remain near the edge or sweep away? | Direction and speed of visible drift; do not enter the cut |
| Trough end beside the point | Does this reachable change fish differently from the straight trough? | Same bait and method, different casting target |
When is it time to move?
Move when the target cannot be fished safely or your presentation will not stay where intended. If the bait repeatedly returns covered in weed, address that problem before deciding the spot has no fish. If you can fish the target properly but get no response, compare another reachable feature. There is no universal number of minutes that proves a spot is empty.
Recheck the beach as tide and light change
A lower tide can make parts of the beach easier to inspect from land. Record visible depressions and exposed sand, then look for those features again when water returns. Do not assume yesterday’s sketch still describes the beach after a storm.
Color is supporting evidence. Dark water can suggest greater depth, but cloud shadows, weed, suspended sand, and changing light can produce a similar effect. Compare color with the repeating wave pattern before deciding what you are looking at.
Keep a short note: tide stage, the landmark, the visible feature, your casting target, and what happened. A note saying ‘bait drifted left immediately’ is useful even on a trip without a bite. Our fishing catch-log guide shows how to keep these observations useful for a return trip.
Avoid these beach-reading mistakes
A simple sketch with two or three landmarks is often more useful than a detailed map based on uncertain clues. Keep observations separate from guesses: “waves break here” is an observation; “the water is four feet deep” is a guess unless you have a reliable measurement.
- Mistaking a cloud shadow for a deeper trough. Check whether the dark patch moves while the wave pattern stays in place.
- Assuming the widest gap is the best target. First check safety, current, and whether you can control the presentation beside it.
- Casting across another angler’s line to reach a promising feature. Change position or target instead.
- Reusing an old map without looking at today’s beach. Recheck after storms and whenever the wave pattern has changed.
Common beach-reading questions
These answers cover the decisions that often come up when applying the steps above.
Do I always need to cast beyond the first sandbar?
No. A reachable trough or bar edge may be a more useful place to compare presentations than water beyond your controlled casting range. Start with a feature you can identify, then change the target if your observations justify it.
Is low tide best for reading the beach or for fishing?
Lower water can expose features that help you understand the beach. That does not establish the best fishing tide: fish, current, access, and the way the structure fills again still matter.
Does dark water always mean deeper water?
No. Shade, weed, suspended sand, and changing light can alter the color. Compare color with repeated wave patterns rather than using it as a depth measurement.
What if I cannot see a trough or sandbar?
Do not invent a feature from one wave. Watch several sets from a safe position, compare a second section of beach, or return under clearer conditions. If the water or access is unsafe, choose another place or day.