
What is a high-low rig?
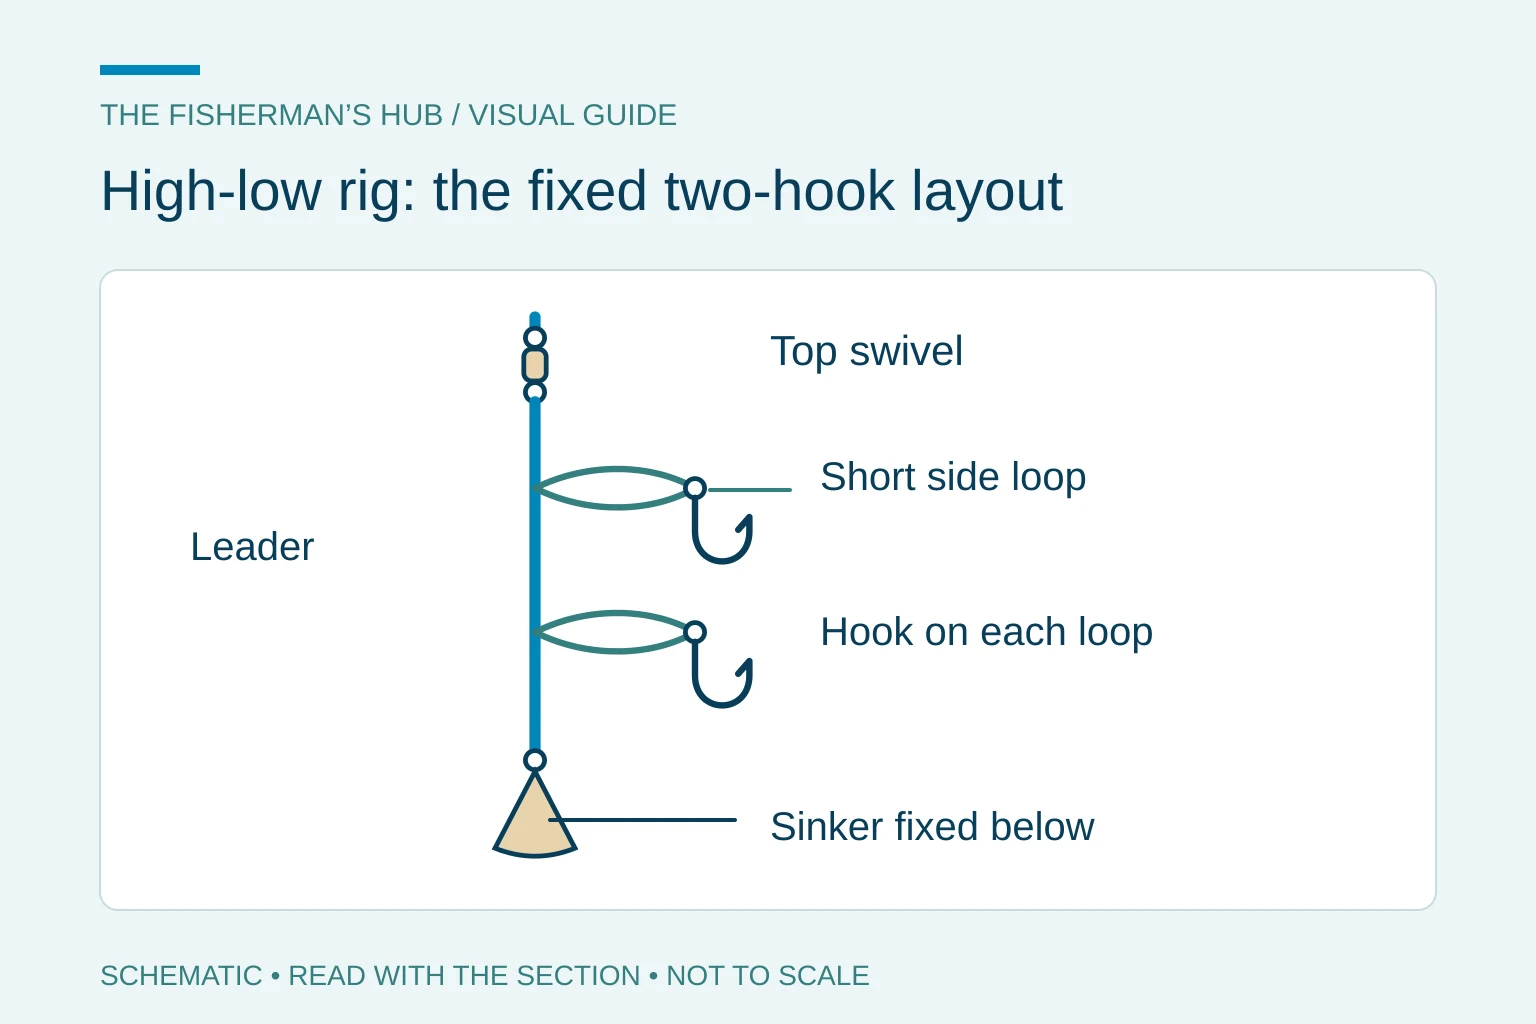
A high-low rig has a sinker fixed at the bottom and two hooks on short side branches above it. You may also see hi-lo rig, double dropper rig, two-hook bottom rig, or drop rig. SCDNR calls this layout a standard bottom rig or drop rig. FWC also uses the name Hi-Lo or Chicken Rig.
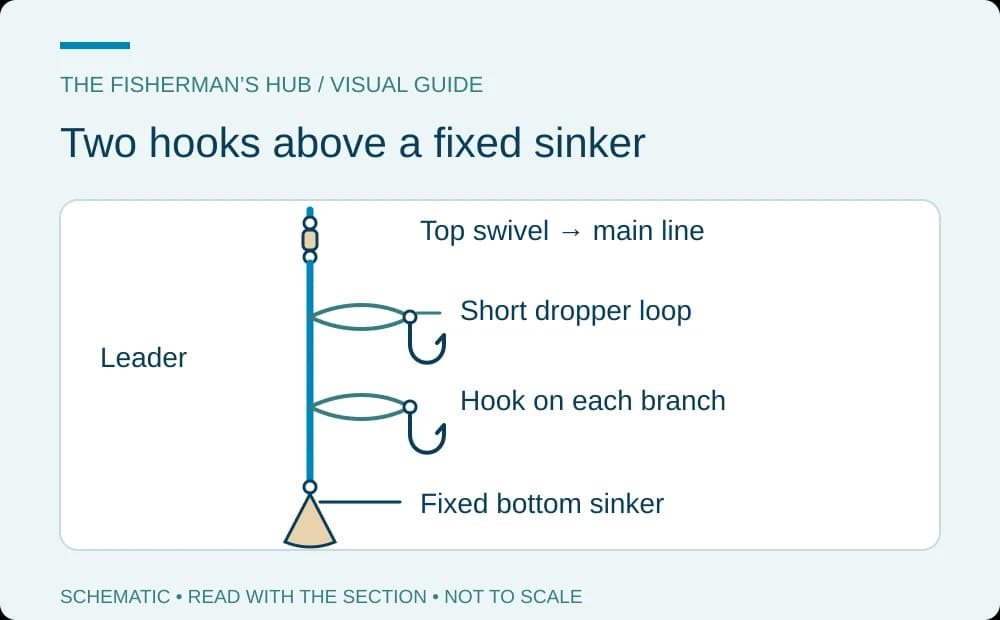
The fixed sinker is the key difference from the sliding-sinker fish finder rig. With a high-low rig, the line does not slide through the weight. SCDNR describes the drop rig as useful when fishing straight down from a pier or boat.
Names vary by region. ODFW calls its fixed three-way-swivel bottomfish layout a bottomfish fish-finder rig. That is different from the sliding rig in our guide. Look at where the sinker attaches before following instructions.
Parts for a two-hook bottom rig
Start at the top: a swivel connects the rig to the main line from your reel. Below it is the leader, the length of line that forms the rig body. Two side branches hold the hooks. A snap swivel, a swivel with a clip, attaches the sinker at the bottom in SCDNR’s version.
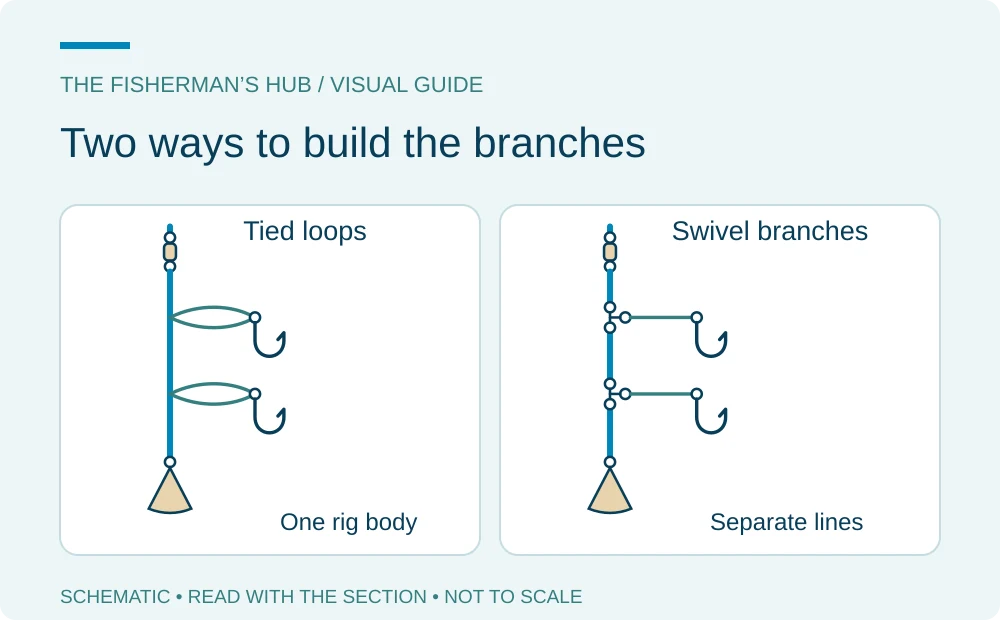
A dropper loop is a loop tied in the middle of a line so it sticks out to the side. You can tie both loops in one leader. The other build uses three-way swivels: small connectors with three eyes, one for each direction of line. Separate short dropper lines run from the side eyes to the hooks.
A snelled hook has line tied around its shank, the straight part below the eye. ODFW’s surfperch example uses snelled hooks on its dropper lines. Choose the build first, then follow the matching instructions below.
| Build | How it is built | Source example | Watch for |
|---|---|---|---|
| Dropper loops in one leader | Tie side loops in the rig body; attach a hook to each loop. | SCDNR layout; Animated Knots loop instructions. | Long loops can foul or twist. |
| Three-way swivels | Join body sections and separate hook lines at swivel eyes. | ODFW Oregon shore rigs. | Its line and hook sizes are species examples, not universal sizes. |
How to tie a high-low rig with dropper loops
Build the loop version from the rig body outward. SCDNR supplies the layout; Animated Knots supplies the dropper-loop knot steps. Keep the branch loops short. The knot should let each loop stand out at roughly a right angle to the leader.
1. Cut a length of leader for your chosen layout. Leave room for the top swivel, two spaced branch knots, and the bottom sinker connection. The sources do not give one leader length for every fish or fishing spot.
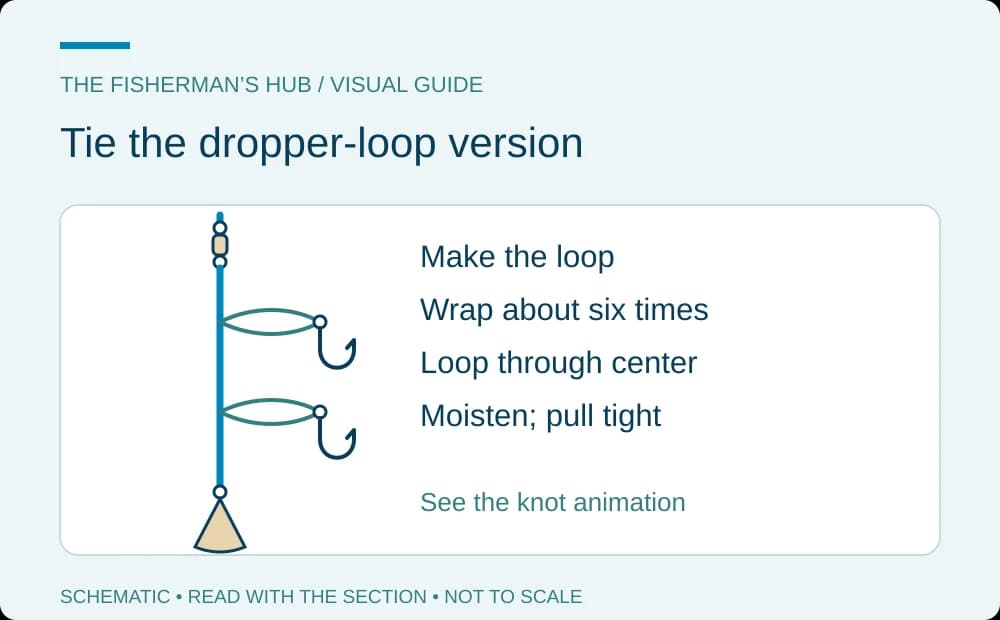
2. Make a large loop in the leader where the first branch will sit. Wrap the loop around the crossover point about six times. Open a hole in the middle of those wraps and pass the loop through it. Moisten the knot, then pull it tight. This follows Animated Knots; use its animation to check the line path.
3. Tie the second dropper loop above or below the first. Keep the two branch points separate. Check the reach of both hooks before deciding that the spacing is finished.
4. Tie the swivel at the top with a knot you know and can tie correctly. If you need that separate lesson, open how to tie a Palomar knot. Attach a snap swivel at the bottom for the sinker, following SCDNR’s layout.
5. Attach a hook to each branch loop. Animated Knots says a hook can sit directly on a dropper loop, but warns against making the loop too long because it can foul or twist. The linked knot guide shows the loop itself; it is not a full hook-attachment lesson.
How far apart should the hooks be?
SCDNR says the loops sit several inches apart. ODFW’s separate surfperch build uses a 24-inch leader with 8–12-inch dropper lines on three-way swivels. Those are different measurements: branch-point spacing is not branch length.
Do not combine those descriptions into a universal recipe. As a practical layout check, keep the side branches short enough that the hooks cannot reach each other or swing back into the rig body. This applies the short-loop warning from Animated Knots; it does not set a new measured distance.
Build the three-way-swivel version
Use a three-way swivel at each branch point instead of tying a dropper loop. The rig body continues through two eyes; a separate hook line attaches to the side eye. The sinker still hangs at the bottom. This is the fixed dropper layout shown by ODFW.
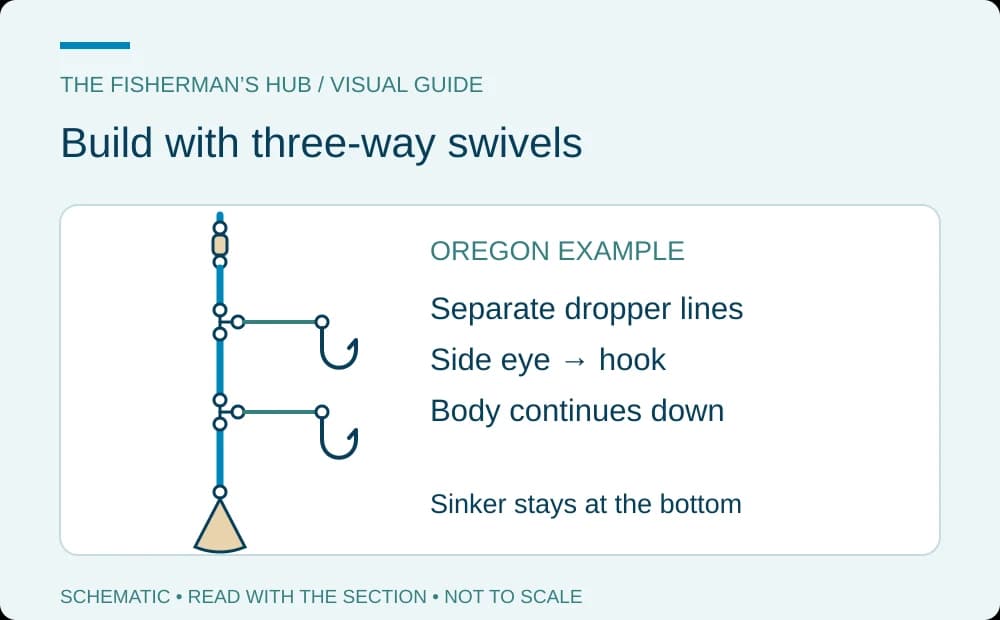
Oregon surfperch example: ODFW shows 10–20 lb main line, a 24-inch leader, 8–12-inch dropper lines, and #2–#4 snelled bait-holder hooks. Its pyramid sinker example is 1–6 oz. These details belong to that redtail surfperch rig, not every surf or pier rig.
In its separate bottomfish example, ODFW specifies leader and dropper lines 2–4 lb lighter than the main line, attached with three-way swivels. Do not transfer that strength difference to every species. Use the strength stated for the particular rig you are following.
Choose the sinker and check the casting load
The sinker stays attached at the lower end of this rig. Its shape affects movement. SCDNR describes pyramid and bank sinkers as holding the rig in place, while an oval shape rolls. That is a shape comparison, not a promise that a sinker will hold in all water.
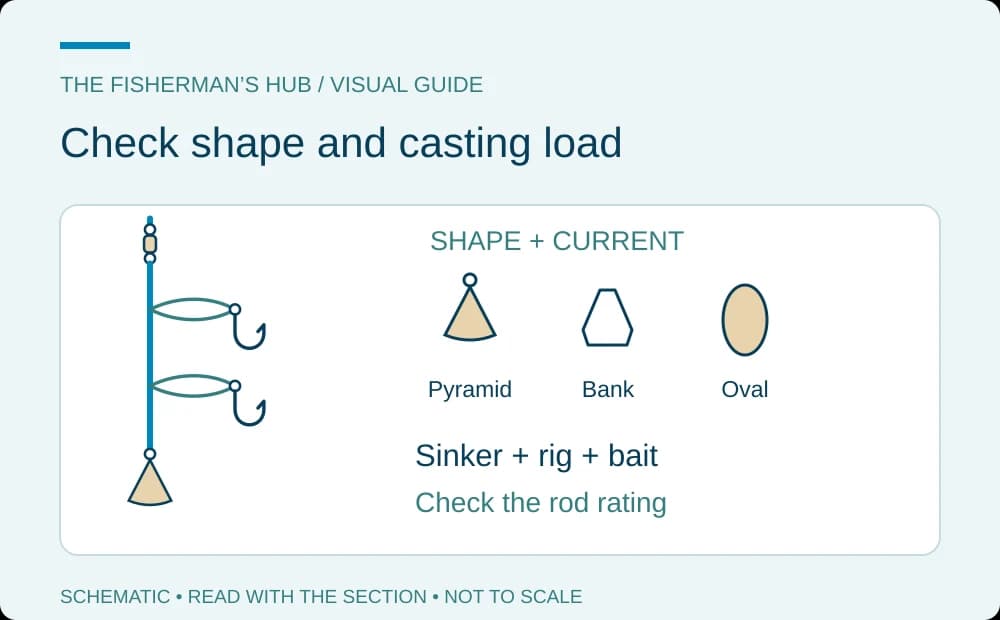
ODFW’s bottomfish example lists ½–6 oz depending on the current. Its surfperch example lists 1–6 oz. Neither range is a universal casting instruction. Keep the examples with their source and fishing context.
Before casting, check the total load: sinker, rig, and bait together. Compare it with your rod’s printed casting rating. Use the surf-fishing sinker-weight checklist for the full load check rather than choosing a weight from the rig name alone.
For bait context, ODFW’s surfperch example lists sand or kelp worms, sand shrimp, clam necks, or mussels. This is the agency’s Oregon example, not a bait recommendation for every beach or species.
High-low rig or fish finder rig?
Choose by the line path. A high-low rig carries two hooks above a fixed bottom sinker. That gives you two bait positions at once; you can put a different bait on each hook. It does not prove that two hooks catch more fish.
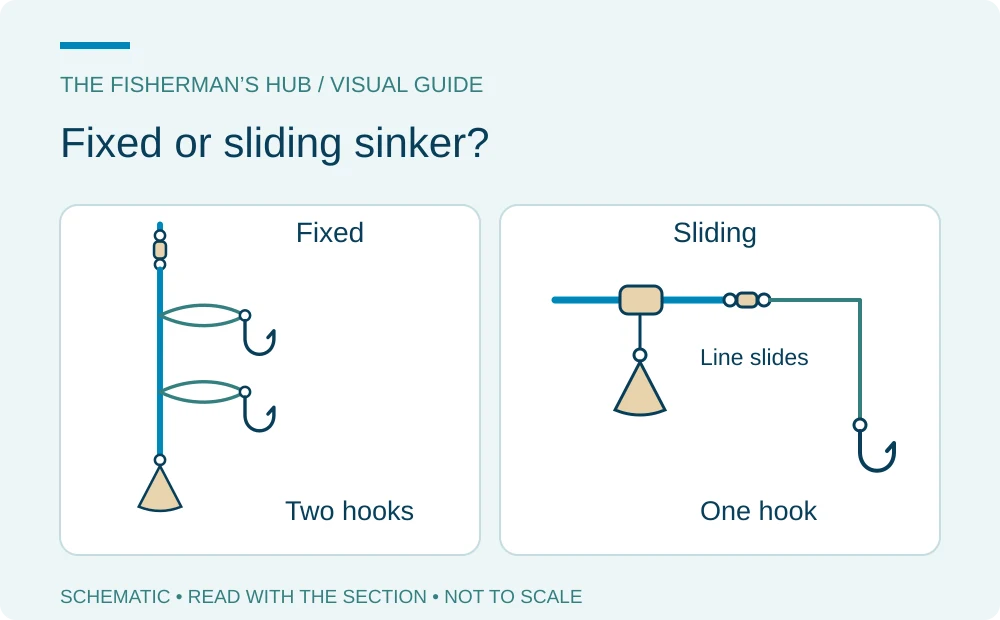
The sliding version lets line move through the sinker or sinker slide before the swivel. Follow the parts and tying instructions in the fish finder guide linked earlier if that is the setup you want. For the whole outfit around either rig, use the beginner surf-fishing setup guide.
| Check | High-low rig | Sliding fish finder rig |
|---|---|---|
| Sinker | Fixed at the bottom. | Line passes through the weight or slide. |
| Hook layout | Two side branches above the sinker. | One hook on the leader in our guide. |
| Next decision | Check branch reach and local hook rules. | Follow the separate sliding-rig guide. |
Check hook rules and prevent tangles
Two hooks mean you must check hook limits. Check current rules for your state and species before you fish. The examples below show why place, species, and hook type matter. They are not a complete rule list for your trip.
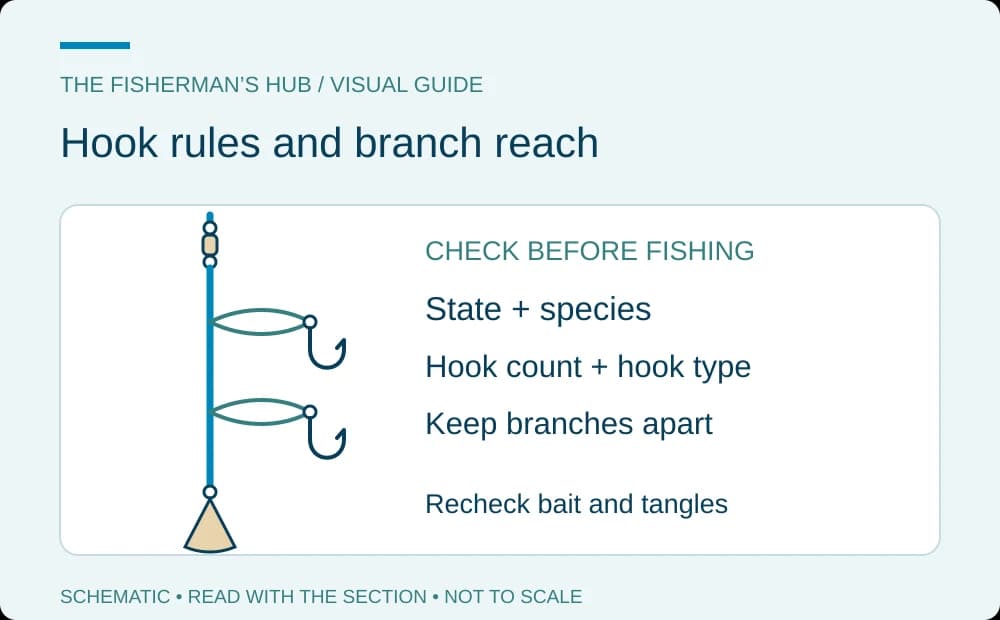
California example: CDFW §28.65 limits San Francisco Bay to one line with no more than three hooks. When rockfish, California scorpionfish, lingcod, cabezon, greenlings of the genus Hexagrammos, or species listed in §28.49 are aboard or in possession, it limits anglers to one line with no more than two hooks.
South of Pigeon Point, the same section prohibits wire or metallic lines or leaders, and hooks wider than 1½ inches at the widest inside measurement, when fishing from shore or within 1,000 yards of the mean high tide line. Do not treat the hook-count example as the only rule that applies.
Atlantic striped bass example: ASMFC’s plan requires inline, non-offset circle hooks when recreationally fishing for striped bass with bait. A circle hook has its point turned back toward the shank. Non-offset means the point and barb lie in the same plane as the shank. States implement the plan and specify local details. The plan excludes an artificial lure with bait attached; check your state’s wording.
Under that plan, striped bass caught by an unapproved method must be returned immediately without unnecessary injury. SCDNR’s handling advice for a circle hook is to get the line tight instead of jerking back to set it. The guide says circle hooks tend to catch the mouth corner rather than the throat.
- Source: ODFW — Oregon shore fishing
- Source: SCDNR — saltwater fishing basics
- Source: Animated Knots — dropper loop
- Source: CDFW — §28.65 General
- Source: ASMFC — striped bass circle hooks
What should I check between casts?
Look for a branch wrapped around the leader or the other hook. Animated Knots warns that an overly long dropper loop can foul and twist. Shorten an overlong loop rather than copying the long dropper lines from a different build.
ODFW says to check bait periodically. Use that pause to look at both baited hooks and the line path before the next cast. A tidy diagram cannot prevent a real rig from tangling.